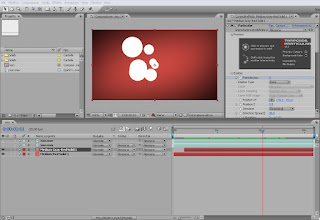
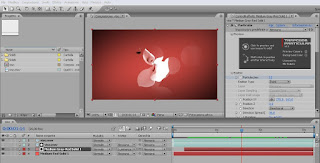
Tutorial Gocce.
In this tutorial we will create a bumper graph using 3D Stroke, Trapcode plug-in very versatile with which you can create lines, handle and move them in 3D space in After Effects with the ability to connect to the virtual camera.
The project is available from the following link:
www.thisappear.com/download/3Dgocce.zip
The result is this:
1.
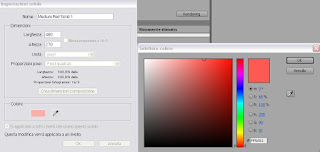
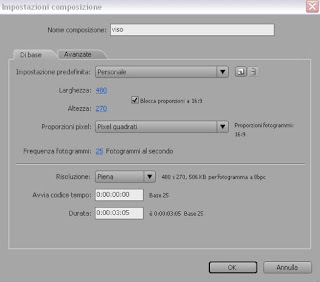
We're going to create a composition called "original" with these settings:
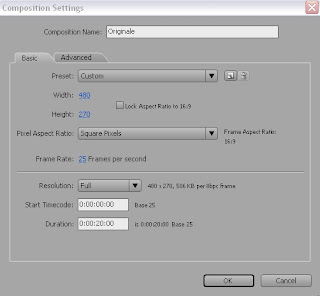
2. We have our
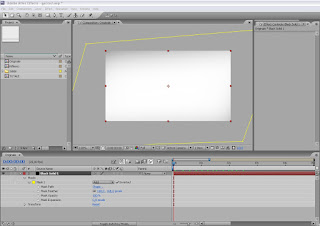
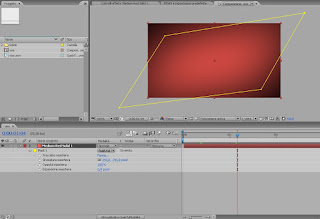
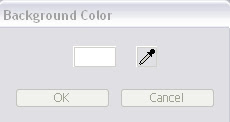
composition a white background color, then: Edit> background color, choose white. Then create a new solid black, draw a diamond-shaped mask and the gradient by increasing the value of "Mask Feather."
3.
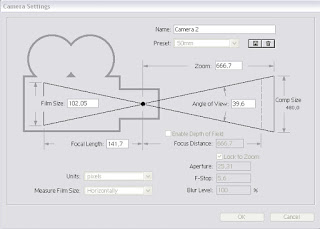
Let's create a camera with a 50mm lens. Layer> New> Camera. These are the settings:
4.
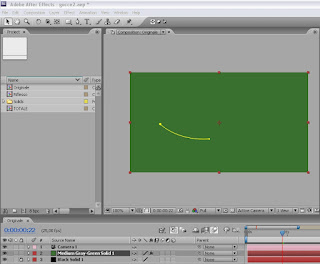
Now let's create our black drops. Create a solid color on the size of any settlement. Layer> New> Solid. Click on "Fit to comp", ok.
Disegnamoci over with a feather mask is not chiusa e curva non troppo grande:
5.
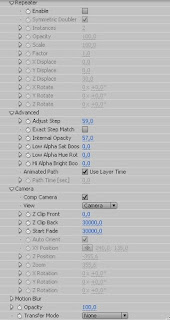
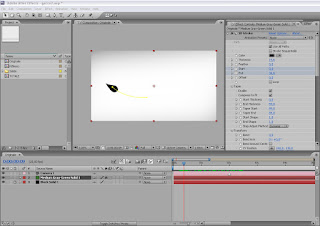
La maschera ci serve per applicare il 3D Stroke. Effetti > Trapcode > 3DStroke. Le impostazioni date al 3D Stroke non generano una linea ma una forma nera animata che ricorda una goccia:
6.
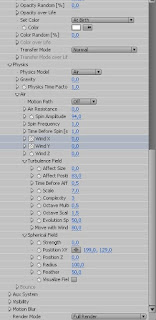
Le impostazioni di base sono le seguenti. Alcune però devono essere animate. Per questa fase vi consiglio di fare riferimento al progetto scaricato.
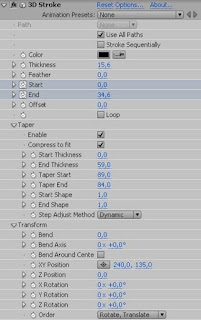
Comunque scriverò di seguido il Keyframe Data di After Effects per il livello 3D Stroke. (Copiare ed incollare sul livello del 3D Stroke il testo seguente. Verranno automaticamente generati dei Keyframe):
Adobe After Effects 8.0 Keyframe Data
Units Per Second 25
Source Width 480
Source Height 270
Source Pixel Aspect Ratio 1
Comp Pixel Aspect Ratio 1
Effects 3D Stroke #1 Start #8
Frame
54 0
64 100
Effects 3D Stroke #1 End #9
Frame
45 0
71 100
End of Keyframe Data
7.
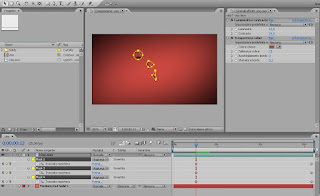
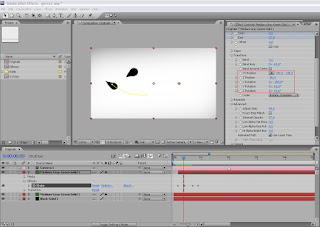
Ora dobbiamo effettuare una operazione un pò complessa. Creata la prima goccia e facendo in modo che si muova verso di noi (verso la Telecamera), dobbiamo creare delle copie del livello (Ctrl+D) per creare altre gocce. Ogni nuova goccia la modifichiamo usando il sotto menu Trasform dell'effetto 3D Stroke e modificando la curva della maschera. Dobbiamo fare in modo che una dopo l'altra seguano un percorso verso di noi. Io ho simulato un tuffo e delle gocce che poi saltano verso l'alto.
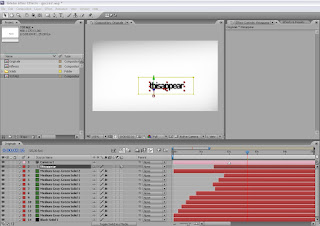
Ho aggiunto in seguito una scritta che esce fuori dall'acqua.
8.
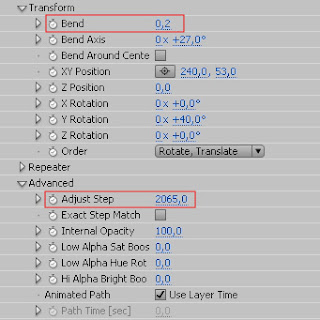
Tra le gocce appare una linea fatta di puntini. Anche quella è generata con 3D Stroke. Quindi create un nuovo solido, applicate il 3DStroke, disegnate una maschera molto lunga stavolta. e modificate i valori "Bend" per variare la forma e "AdjustStep" per la quantità di pallini da visualizzare.
again you have to animate the Start and End to appear and disappear, the line:
Adobe After Effects 8.0 Keyframe Data Units
Per Second 25 Source Width 480
Source Height 270 Source Pixel Aspect Ratio 1 Comp Pixel Aspect Ratio 1
Effects 3D Stroke # 1 Color # 5
Frame Alpha Red Green Blue 0 0 255 0
Effects 3D Stroke # Frame Thickness 1 # 6
Effects 2.7 3D Stroke # 1 # 7
Feather Frame
0
Effects 3D Stroke #1 Start #8
Frame
18 0
46 100
Effects 3D Stroke #1 End #9
Frame
0 0
43 100
Effects 3D Stroke #1 Offset #10
Frame pixels
0
End of Keyframe Data
9.
A questo punto dovremmo avere la linea, la scritta e tutte le nostre gocce animate. E' interessante fare un movimento di camera che segua tutto il percorso. Ricordiamoci di modificare le curve di movimento affinchè la carrellata risulti più morbida.
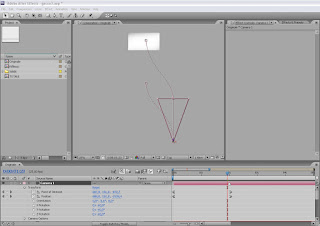
10.
Per creare la riflessione in basso, duplichiamo nella libreria la composizione "Originale" e la copia la chiamiamo "Riflesso". Ribaltandola e applicando una maschra sfumata otterremo una riflessione.
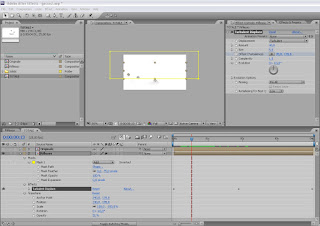
E' importante però modificare alcune parti della composizione "Riflesso" perchè sia verosimile, tipo nascondere qualche livello e adattare la posizione della scritta all'originale.
11.
In fine aggiungere durante il percorso degli anelli animati tridimensionali that help to give the idea of \u200b\u200ba water surface.
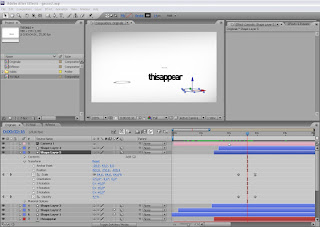
I realize that this tutorial is a bit complex. Help you with the project download page at the beginning.
Bye.
Friday, November 28, 2008
Monday, November 10, 2008
Black Ivory Wedding Centerpieces
Scarpetta - The new novel
Il 2 Dicembre uscira', in America, the new novel in the series "Kay Scarpetta " with the title "Scarpetta".
LINER
Leaving behind her private practice of forensic pathology in Charleston, South Carolina, Kay Scarpetta accepts an assignment in New York City, where the NYPD (New York Police Department) asked her to examine an injured custody to the prison psychiatric hospital Bellevue. The
handcuffed and chained patient, Oscar Bane, has specifically asked her, and when she puts it, literally, his gloved hand on him, he starts talking and starts to tell the story turns out to be one of the most 'strange that she 've ever heard.
wounds he says, has reported during a murder ... that he did not commit!
To read the rest of the message click here
Thursday, November 6, 2008
Dune Buggygame Cheats
Tutorial viso particellare
With this tutorial we will create a visualization using video Particular (Trapcode) for After Effects and a demo clip of Artbeats. In the "Links" lists some sites where you can buy high quality video clips or where you can download the demo clip.
NOTE: The tutorial has described the demonstration purposes only and non-profit organization. The use of this material and responsibility of the user himself.
The final video will be this:
1.
Open a new project in After Effects and create a composition with the following parameters:
2.
From the "level" create a new solid with these parameters and color:
3.
Draw a diamond-shaped mask on the solid and nuanced.
In this way we create a background for our video. This level it will always last.
4.
hours in the library import the video of the girl (viso.mov) and apply two effects:
1 - Effects> Color Correction> Brightness and Contrast.
2 - Effects> Transparency> Color Key.
For both effects we have made the following values:
5.
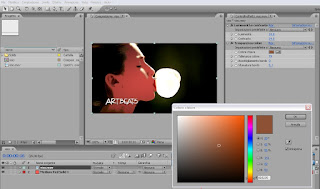
In this video we just need some parts, so we will use three masks to show only what interests us: the eye, nose and mouth. As you can see in the image to the eye and nose, we can use masks oval, the mouth is good to use the pen to draw around the perimeter of the lips more accurately. Draw
forms, sending in play, we see that when you play the video the girl is moving slightly. We'll have to animate the "mask path" of all the masks to keep visible eye nose and mouth, as shown below. (I took the video only the central part where the balloon bursts that quello che va da01:11
secondi a 04:15 secondi, poi ho tagliato la composizione che dura ora solo 3 secondi e 4 frames).
6.
Duplichiamo il livello viso. Nel livello "viso.mov" (2° livello), cancelliamo le tre maschere (qui non ci servono) e cancelliamo l'effetto "trasparenza colore", mantenedo solo l'effetto "Luminosità e contrasto". Andiamo a creare un nuovo solido con le dimensioni della composizione, non importa il colore e lo mettiamo come penultimo livello, subito sopra lo sfondo. Qui applicheremo il particellare.
7.
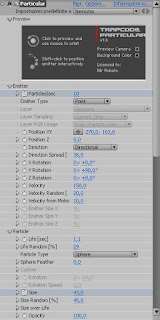
Selezioniamo il penultimo livello (il solido) e applichiamo il Particular: Effetti > Trapcode > Particular. Con un pò di pazienza, inserire i parametri del particular secondo le immagini seguenti:
Alcuni parametri, per migliorare l'effetto, li ho animati. Nella cartella di progetto c'è un file chiamato "Parametri_Particular.txt". Apriamo il file, copiamo tutto il testo poi torniamo su After Effects selezioniamo il livello solido con il Particular e incolliamo. Magicamente i keyframe di animazione appaiono sulla timeline. La possibilità di incollare i keyframe su un file di testo è una funzione molto comoda di After Effects.
Nascondendo i due video "viso.mov" cliccando sull'occhietto a sinistra, già sono visibili le particelle bianche.
Al livello del particellare, ho dato all'inizio una assolvenza to bring up the particles so soft.
8. Finally we make it visible again
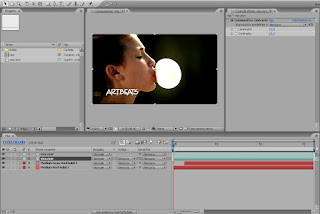
levels "viso.mov" and apply it to the particle level, under the column "TrkMat" (Luma Matte "viso.mov). (If the column does not appear, press the button under "Toggle Switches / Modes"):
9.
The video is complete. The result is as follows:
I hope everything is clear. If not, please tell adding comments to the post, I will try to fix it.
Link:
http: \\ \\ www.thisappear.com \\ download \\ TutorialViso.zip \\
find the whole project. Enjoy.
Subscribe to:
Posts (Atom)