thisappear.com 2009
Finally on-line the new version of the site.
www.thisappear.com
Bye.
Thursday, September 17, 2009
Friday, September 4, 2009
Freezing Wart Recovery
Tutorial Slow Motion
In this tutorial we see how can get the slow motion effect on a test clip.
The plug-in that we will need is called "Twixtor 3.x" if you did not grab it, otherwise follow the tutorial without working in After, is not very complicated.
At the end of the tutorial there is a solution to achieve a similar effect by using instead of the plug-in, a proper function of After Effects.
Here is the finished result:
NOTE: The tutorial has described the demonstration purposes only and not for profit. The use of this material and responsibility of the user himself.
E 'may download material from here:
http://www.thisappear.com/download/tutorialslowmotion.zip
1.
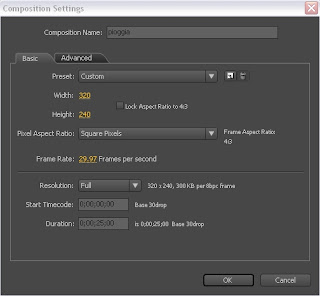
Open After Effects, import the video "pioggia.mov" from the library and drag it down, the film on the icon "Create a new composition." Automatically creates a composition with the characteristics of the clip:
2.
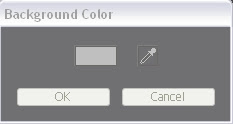
Edit the background color of the comp. We do white
Composition -> Background Color -> (White) -> OK.
3.
In the Timeline, activate the 3D level of "Rain" by clicking on the cube. Pressing 'P' View the submenu "position" with X, Y, Z. Z set to the value "-100".
4.
still select the layer and clicking on the menu at the top level -> Time -> Time Stretch, opens a window where you can set the speed play the clip. Set the value "30%".
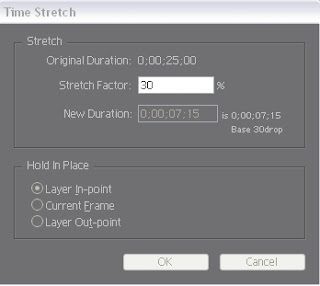
The source video is slowed down. In this way, more or less back to normal speed.
5.
Good. We repeat the initial operation: Drag the clip "pioggia.mov" on the icon of the film. This creates a new comp. Rename them (hit Enter) and call it "Slowmotion Rain."
Now we import the comp "Slowmotion Rain" dento the comp "Rain":
Tagliamo il livello "pioggia.mov" a 2 secondi della Timeline e applichiamo una dissolvenza finale: Opacity 100% -> 0% in questo modo la clip sfuma su bianco.
Tagliamo ora il livello "Pioggia Slowmotion" in modo da visualizzare la parte successiva ai 2 secondi della Timeline e inseriamo un'assolvenza iniziale: Opacity 0% -> 100%.
Se risulta complesso, aiutatevi in questa fase con il progetto scaricato.
Applichiamo ora uno zoom out sulla foglia bagnata: selezioniamo il livello "pioggia Slowmotion" premiamo "i" il cursore si posiziona all'inizio. Attiviamo anche per questo livello la funzione 3D (cubeto) poi "P" Z and we set the value "-100" orologino press the left to enter the keyframe. Now, press "O" the cursor goes at the end of the clip here and set Z = 0. See the picture above.
In this way we have connected the two levels in order to obtain a single video with a fade to white.
6. We apply the level
"Slowmotion Rain" plug-in "Twixtor".
Twixtor works on the frame of the clip. In practice creates between one frame to another, like so many other frames, so you get a much more fluid movement of the objects represented. This is called "blending." There are two types of blending: normal vector. That "normal" even just for After Effects applies to small fading between frames. The vector much more efficiently, reconstructs the pixels in a frame and the other by vector calculation of the shapes and colors. Twixtor performs a blending vector.
Here are the settings:
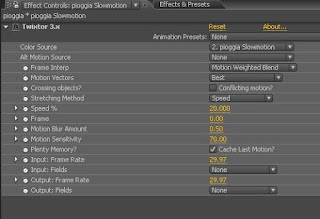
As you can see under Speed \u200b\u200bcan set the speed of the clip. We insert the value "20%". Also set to get a good result Motion Vectors = "Best" and Frame Interp = "Motion Weigthed Blend." You're done.
The clip used in the project has already slowed in origin. Sicuramante this has facilitated the final slow motion. In addition, the background is fairly static this makes things easier. I mean you have to use the vector Blanding carefully, to avoid the risk of "mixing" the frames.
7.
E 'can use the blender for After Effects to get a similar effect:
enables parameters such as image and slowing the clip with "time dilation" directly on the level of the movie, we get a slow motion "free."
I hope everything is clear.
soon;)
Subscribe to:
Posts (Atom)