Friday, December 5, 2008

Translate Bus Ticket French

Tutorial rami che crescono

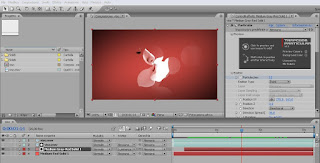
With this tutorial we will create a visual effect with After Effects which appear in the branches and leaves that are born and grow.
The result is as follows:


1.
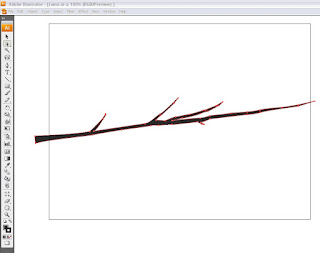
start this time by opening Adobe Illustrator. In a paper we design a new branch. We can also trace it to a photo imported. Over the branch is flourishing so the effect is more appealing but also more difficult to achieve. I designed a fairly simple, leafless branch.


2.
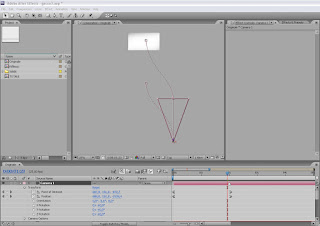
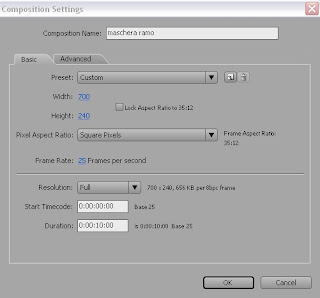
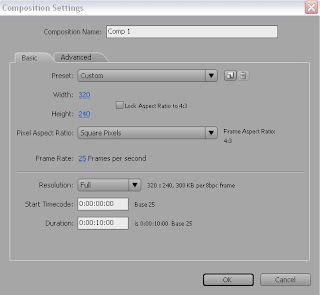
Illustrator has a very comfortable, that is, the ability to copy the marks painted, paste them into After Effects on a sound and turn them into form. Then, with the white arrow to select all punti del ramo, copiamo (ctrl+c). Apriamo After, andiamo a creare una nuova composizione con le seguenti impostazioni:


3.
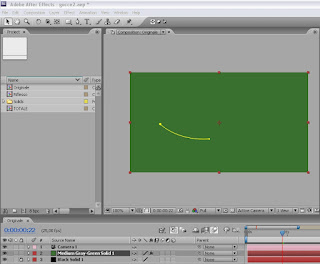
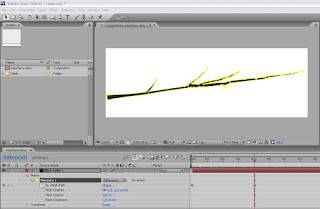
Andiamo a Creare un solido grigio scuro della grandezza della composizione: Livello > nuovo > solido > grandezza della composizione, ok. Selezioniamo il livello del solido e (ctrl+v), incolliamo i punti copiati prima. Apparirà sul solido una maschera con la stessa forma del ramo di illustrator. Assicuriamoci che la maschera sia chiusa per evitare che si creino artefatti. Ecco il risultato:


4.
Now we have to animate this mask to reveal the branch in time. Suppose we want to prolong the growth two seconds. We position the cursor in two seconds and orologino activate the mask path. Now place the cursor at zero seconds and with a little patience we group all points of the form to the left, near the base of the branch. To help select the arrow tools, we select a group of points on the mask and spostiamoli to the left as if we were to shorten the branch by creating a strain qundi smaller and being careful not to let strange curves. In this case shorten the bezier handles. No matter how they are made exactly the points, the important thing is that they are "stacked"
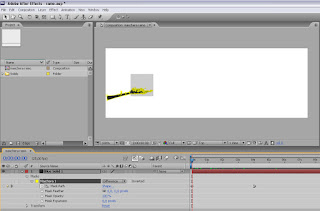


moving the head of the timeline from zero to two seconds we can see branch that grows from left to right. To make this movement more appealing, we can put more time and grow keyframe in the first part and then another branch.

5. Applying
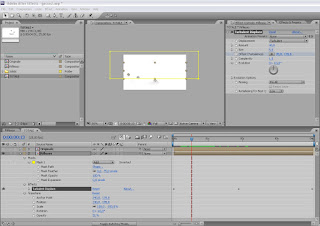
effect reduction matte, the solid and animation in the right way we will ensure that the branch is expanded, giving the idea that you really enlarge. This effect when applied good is very effective: Effects> Matte> Matte Choker.
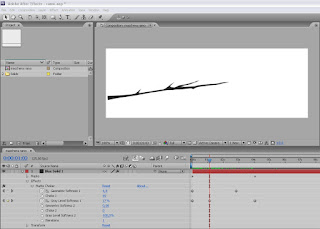


I've animated in this way (copy and paste the keyframe on the level of the branch)
or make reference to the project you downloaded.

Adobe After Effects 8.0 Keyframe Data Units


Per Second 25 Source Width 700 Source Height 240

Source Pixel Aspect Ratio 1 Comp Pixel Aspect Ratio 1


Effects Matte Choker # 1 # 2 1 Geometric Softness
Frame
0 7.9 71 0


Effects Matte Choker # 1 Softness Gray Level 1 Frame # 4
percent

0 9 28 101 16.6337 69


End of Keyframe Data

6.
We do a similar thing on another solid orange. New> Solid, ok. Draw a mask-shaped leaf with 4 or 5 points and we grow up in a couple of seconds of time, animating the mask path.
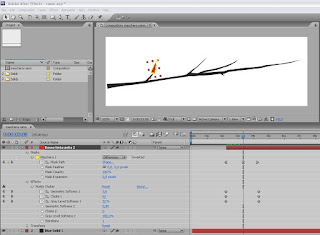


also apply to the leaf effect "reduction matte" animated.


7.
duplicate the leaf level and leaves adorn the branch with different masses with different angle or form. Remember to staggered levels over time and make sure that the leaves displayed only when the branch is grown under:
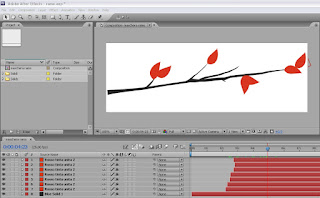


In fact, the leaves are separated from the animation branch. In fact, you can animate the branch that grows with the leaves already drawn, only the leaves should be the same color of the branch.

8.
Let's create a new composition with the following settings:
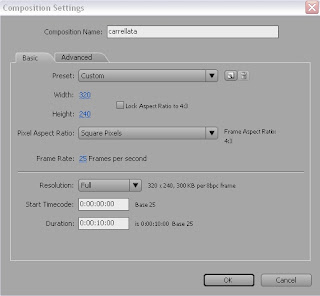


Here we will

branches in 3D space and we'll do a round back with the virtual camera.

9. Quickly we
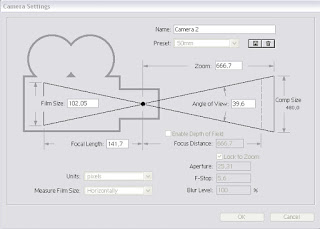
: a virtual video camera (50mm): New> Camera> 50mm; insert two times the composition of the branch and activate the third dimension by clicking on the cube. A move deeper into the Z-axis (left to arrange them in a proper frame, as in the picture) also staggered levels over time to grow a branch first then the other, adding a new light> light> type: spot (or spot), which illuminate the branches. The background color of the composition is white. I have added a solid orange blended with an oval mask to give depth.
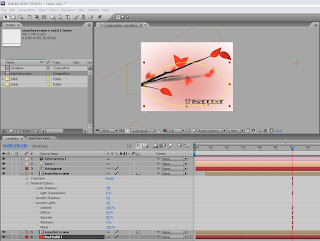


10.
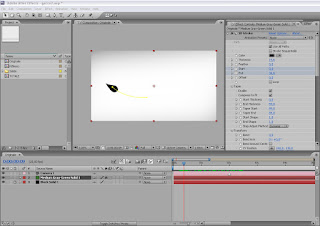
Good. Now there are only a few details. Remember to activate the "Accept Lights" on levels of branches, otherwise no light shines on them. The cone of light makes the colors of the branches soft.
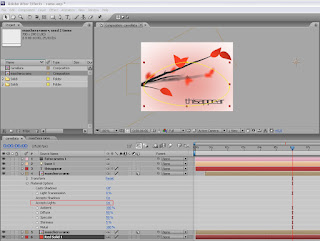


We try to make a camera movement interesting. I made a slow parade back and I used depth of field to focus on the first branch back then the front. Il metodo è quello di fissare un'apertura e animare il fuoco.
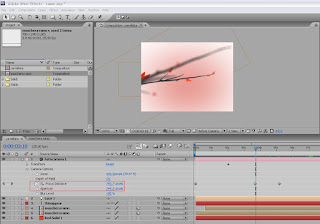


Lasciate uno spazio in basso se volete per aggiungere del testo.

Spero sia tutto chiaro. Avere delle conoscenze di base del programma sicuramente aiuta.
Se qualcuno ha delle domande anche banali sul funzionamento specifico di uno strumeto di After Effects può scrivere un commeto o una mail e vedrò di fare un tutorial apposito.

Il file di progetto di questo tutorial è su:

www.thisappear.com/download/rami.zip

Bye
Wednesday, December 3, 2008

Order Of Service Font Sugestions

Tutorial battitura testo

Spesso può be useful to create titles in After Effects, by displaying the text of a letter written after the other as a printer, or typed on a typewriter keyboard with the cursor, etc ... so:


is simple but not so obvious. So.

1.
Create a new composition with these settings:


2.
take the instrument "Text" and write what you want at the center of the stage.

3. Opening
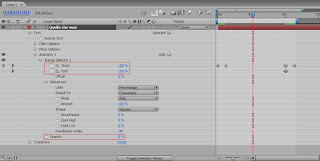
the sub-level "text" will appear a button on the right called "Animation":


Click and choose from the dropdown menu "Opacity".

4.
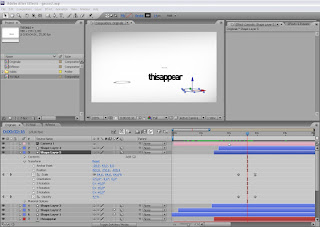
text layer is added to a submenu called "Animatore1" that within the parameter "Opacity" abbassiamolo zero. By varying the parameters "start" and "End" of the soul the word appears and disappears.


changing the parameter "soft" (or smoothness) under "Advanced" letters appear more or less smoothly. I animated letters to appear and disappear following the same direction. This method can also be applied to multiple properties of the text simultaneously. Try it.

Here you can download the animation:

http://www.thisappear.com/download/BattiTesto.zip

Bye

Friday, November 28, 2008

Body Paint Volleyball Team

Tutorial Gocce.

In this tutorial we will create a bumper graph using 3D Stroke, Trapcode plug-in very versatile with which you can create lines, handle and move them in 3D space in After Effects with the ability to connect to the virtual camera.
The project is available from the following link:

www.thisappear.com/download/3Dgocce.zip

The result is this:


1.
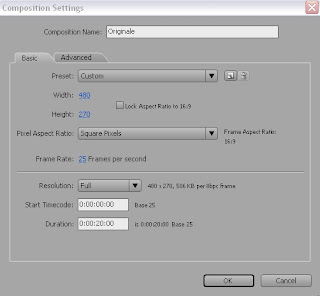
We're going to create a composition called "original" with these settings:


2. We have our
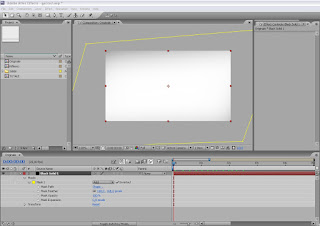
composition a white background color, then: Edit> background color, choose white. Then create a new solid black, draw a diamond-shaped mask and the gradient by increasing the value of "Mask Feather."


3.
Let's create a camera with a 50mm lens. Layer> New> Camera. These are the settings:


4.
Now let's create our black drops. Create a solid color on the size of any settlement. Layer> New> Solid. Click on "Fit to comp", ok.
Disegnamoci over with a feather mask is not chiusa e curva non troppo grande:


5.
La maschera ci serve per applicare il 3D Stroke. Effetti > Trapcode > 3DStroke. Le impostazioni date al 3D Stroke non generano una linea ma una forma nera animata che ricorda una goccia:


6.
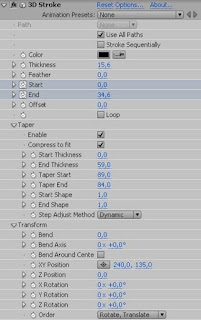
Le impostazioni di base sono le seguenti. Alcune però devono essere animate. Per questa fase vi consiglio di fare riferimento al progetto scaricato.


Comunque scriverò di seguido il Keyframe Data di After Effects per il livello 3D Stroke. (Copiare ed incollare sul livello del 3D Stroke il testo seguente. Verranno automaticamente generati dei Keyframe):

Adobe After Effects 8.0 Keyframe Data

Units Per Second 25
Source Width 480
Source Height 270
Source Pixel Aspect Ratio 1
Comp Pixel Aspect Ratio 1

Effects 3D Stroke #1 Start #8
Frame
54 0
64 100

Effects 3D Stroke #1 End #9
Frame
45 0
71 100


End of Keyframe Data

7.
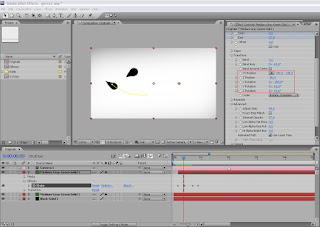
Ora dobbiamo effettuare una operazione un pò complessa. Creata la prima goccia e facendo in modo che si muova verso di noi (verso la Telecamera), dobbiamo creare delle copie del livello (Ctrl+D) per creare altre gocce. Ogni nuova goccia la modifichiamo usando il sotto menu Trasform dell'effetto 3D Stroke e modificando la curva della maschera. Dobbiamo fare in modo che una dopo l'altra seguano un percorso verso di noi. Io ho simulato un tuffo e delle gocce che poi saltano verso l'alto.


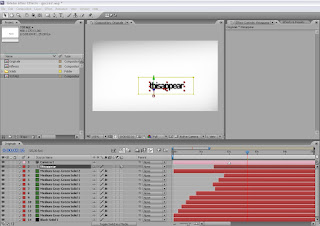
Ho aggiunto in seguito una scritta che esce fuori dall'acqua.


8.
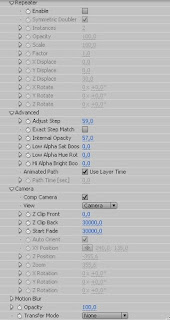
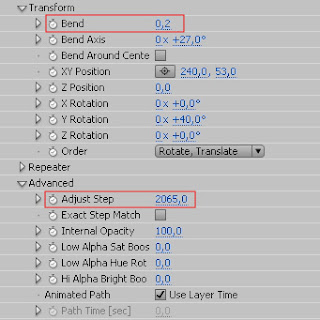
Tra le gocce appare una linea fatta di puntini. Anche quella è generata con 3D Stroke. Quindi create un nuovo solido, applicate il 3DStroke, disegnate una maschera molto lunga stavolta. e modificate i valori "Bend" per variare la forma e "AdjustStep" per la quantità di pallini da visualizzare.


again you have to animate the Start and End to appear and disappear, the line:

Adobe After Effects 8.0 Keyframe Data Units

Per Second 25 Source Width 480


Source Height 270 Source Pixel Aspect Ratio 1 Comp Pixel Aspect Ratio 1


Effects 3D Stroke # 1 Color # 5
Frame Alpha Red Green Blue 0 0 255 0


Effects 3D Stroke # Frame Thickness 1 # 6


Effects 2.7 3D Stroke # 1 # 7
Feather Frame
0

Effects 3D Stroke #1 Start #8
Frame
18 0
46 100

Effects 3D Stroke #1 End #9
Frame
0 0
43 100

Effects 3D Stroke #1 Offset #10
Frame pixels
0


End of Keyframe Data

9.
A questo punto dovremmo avere la linea, la scritta e tutte le nostre gocce animate. E' interessante fare un movimento di camera che segua tutto il percorso. Ricordiamoci di modificare le curve di movimento affinchè la carrellata risulti più morbida.


10.
Per creare la riflessione in basso, duplichiamo nella libreria la composizione "Originale" e la copia la chiamiamo "Riflesso". Ribaltandola e applicando una maschra sfumata otterremo una riflessione.


E' importante però modificare alcune parti della composizione "Riflesso" perchè sia verosimile, tipo nascondere qualche livello e adattare la posizione della scritta all'originale.


11.
In fine aggiungere durante il percorso degli anelli animati tridimensionali that help to give the idea of \u200b\u200ba water surface.


I realize that this tutorial is a bit complex. Help you with the project download page at the beginning.
Bye.

Monday, November 10, 2008

Black Ivory Wedding Centerpieces

Scarpetta - The new novel

Il 2 Dicembre uscira', in America, the new novel in the series "Kay Scarpetta " with the title "Scarpetta".


LINER

Leaving behind her private practice of forensic pathology in Charleston, South Carolina, Kay Scarpetta accepts an assignment in New York City, where the NYPD (New York Police Department) asked her to examine an injured custody to the prison psychiatric hospital Bellevue. The
handcuffed and chained patient, Oscar Bane, has specifically asked her, and when she puts it, literally, his gloved hand on him, he starts talking and starts to tell the story turns out to be one of the most 'strange that she 've ever heard.
wounds he says, has reported during a murder ... that he did not commit!

To read the rest of the message click here

Thursday, November 6, 2008

Dune Buggygame Cheats

Tutorial viso particellare

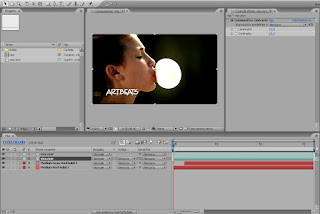
With this tutorial we will create a visualization using video Particular (Trapcode) for After Effects and a demo clip of Artbeats. In the "Links" lists some sites where you can buy high quality video clips or where you can download the demo clip.

NOTE: The tutorial has described the demonstration purposes only and non-profit organization. The use of this material and responsibility of the user himself.

The final video will be this:


1.
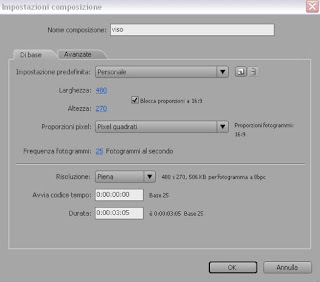
Open a new project in After Effects and create a composition with the following parameters:


2.
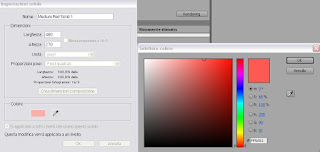
From the "level" create a new solid with these parameters and color:


3.
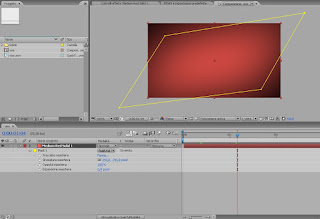
Draw a diamond-shaped mask on the solid and nuanced.
In this way we create a background for our video. This level it will always last.


4.
hours in the library import the video of the girl (viso.mov) and apply two effects:

1 - Effects> Color Correction> Brightness and Contrast.
2 - Effects> Transparency> Color Key.

For both effects we have made the following values:


5.
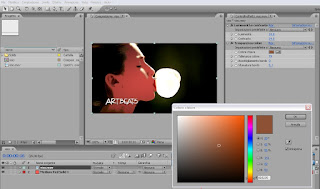
In this video we just need some parts, so we will use three masks to show only what interests us: the eye, nose and mouth. As you can see in the image to the eye and nose, we can use masks oval, the mouth is good to use the pen to draw around the perimeter of the lips more accurately. Draw
forms, sending in play, we see that when you play the video the girl is moving slightly. We'll have to animate the "mask path" of all the masks to keep visible eye nose and mouth, as shown below. (I took the video only the central part where the balloon bursts that quello che va da01:11
secondi a 04:15 secondi, poi ho tagliato la composizione che dura ora solo 3 secondi e 4 frames).


6.
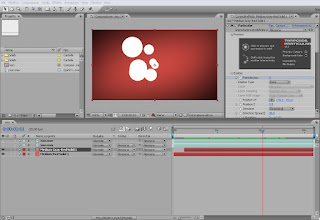
Duplichiamo il livello viso. Nel livello "viso.mov" (2° livello), cancelliamo le tre maschere (qui non ci servono) e cancelliamo l'effetto "trasparenza colore", mantenedo solo l'effetto "Luminosità e contrasto". Andiamo a creare un nuovo solido con le dimensioni della composizione, non importa il colore e lo mettiamo come penultimo livello, subito sopra lo sfondo. Qui applicheremo il particellare.


7.
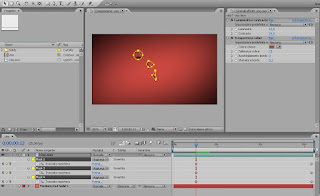
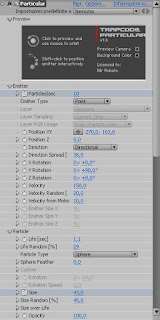
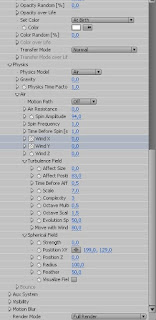
Selezioniamo il penultimo livello (il solido) e applichiamo il Particular: Effetti > Trapcode > Particular. Con un pò di pazienza, inserire i parametri del particular secondo le immagini seguenti:


Alcuni parametri, per migliorare l'effetto, li ho animati. Nella cartella di progetto c'è un file chiamato "Parametri_Particular.txt". Apriamo il file, copiamo tutto il testo poi torniamo su After Effects selezioniamo il livello solido con il Particular e incolliamo. Magicamente i keyframe di animazione appaiono sulla timeline. La possibilità di incollare i keyframe su un file di testo è una funzione molto comoda di After Effects.
Nascondendo i due video "viso.mov" cliccando sull'occhietto a sinistra, già sono visibili le particelle bianche.


Al livello del particellare, ho dato all'inizio una assolvenza to bring up the particles so soft.

8. Finally we make it visible again
levels "viso.mov" and apply it to the particle level, under the column "TrkMat" (Luma Matte "viso.mov). (If the column does not appear, press the button under "Toggle Switches / Modes"):


9.
The video is complete. The result is as follows:


I hope everything is clear. If not, please tell adding comments to the post, I will try to fix it.
Link:

http: \\ \\ www.thisappear.com \\ download \\ TutorialViso.zip \\

find the whole project. Enjoy.

Saturday, October 11, 2008

Welcome Gift Note Sample

The new book by Patricia Cornwell

Hello, I have been absent in the latter period, 'cause I'm working on new pages (you will see interesting developments!).
For the moment I anticipate that the new book by Patricia Cornwell and 'scheduled for December and will have' the title "Scarpetta".
When I have 'more information, we will find the site The Mysteries of Patricia Cornwell and blog.
Meanwhile I wish you a very good weekend for everyone.

Thursday, August 7, 2008

Six Days Delay Of Menstration

The inconsistencies of the Kay Scarpetta series by Patricia Cornwell Biography

Dear Fabiana, actually there are inconsistencies on the Kay Scarpetta series. In
Postmortem, Patricia Cornwell, has written that Lucy was 10 years later in two books already become 'a twenty. Probably did it to make it more 'participatory. However if you want to know all the references in chronological order, you can visit my site:
Mysteries by Patricia Cornwell , just click on the name of the site. Have a nice reading

Lorenza

Tuesday, May 20, 2008

Direct Bury Phone Line

The updated

Finally, after the time spent to translate and review the material, I published the updated biography of Patricia Cornwell.
Although it is not 'definitive,' cause I'm still improving it, I'm happy to have published. There are many pages in more ', with a wealth of information.
His childhood, his problems and more, will lead you to discover the life of the famous writer.
I'm happy if I do know your opinion and I wish you good navigation de Mysteries by Patricia Cornwell . Good day to all

Friday, May 9, 2008

Brazilian Wax Den Haag

News' on Patricia Cornwell novels by Patricia Cornwell

few days ago I received news from a site Patricia Cornwell.
Awaiting the release of the new book in the series of "At Risk", which will be 'released in America on May 20, announced that the new book on Kay Scarpetta will be released', always in America, October 7 this year, with the entitled "Scarpetta".
also tell you that the author, with novel "The Book of the Dead" won the award for Books Direct Crime Thriller of the Year at the Galaxy British Book Awards 2008. Meanwhile
and I 'got the book "Food to Die For: Secrets from Kay Scarpetta's Kitchen" a book published only in English, which I am about to translate and which will give you' news soon. The biography of my site will 'soon-to-date, so you can always give more information' updated.
Given that these days will take place 'in my city' native, Bassano del Grappa, a gathering of the mountain, I wish all the Alpine I are reading a very good meeting.
soon

Thursday, April 17, 2008

Confidentiality Clause In Emails Example

finally on TV

Finally the queen of yellow, Patricia Cornwell , bring 'adaptations of two of his novels, At Risk and the novel soon to be released May 20, The Front, on the small screen after signing an agreement with the issuer Lifetime. The

Cornwell, who will also executive producer of the two projects together with M. Stanley Brooks, Jim Head, Russell Werdin and Lane Bishop, said she was excited about the agreement reached Lifetime, which has previously been involved in numerous adaptations of literary works.

at risk - which two years ago was published in serial form in The New York Times Sunday Magazine, before going out in the library - the story of the detective Garaño Winston, who is nominated by the District Attorney Monique Lamont to investigate a murder twenty years ago in Tennessee, and which has never found the culprit. Garaño, who is attending a specialization course at the National Forensic Academy, can not understand why the Lamont's has given a similar assignment, but soon discovers that behind what appears to an old unsolved case, lies a complicated maze of power.